


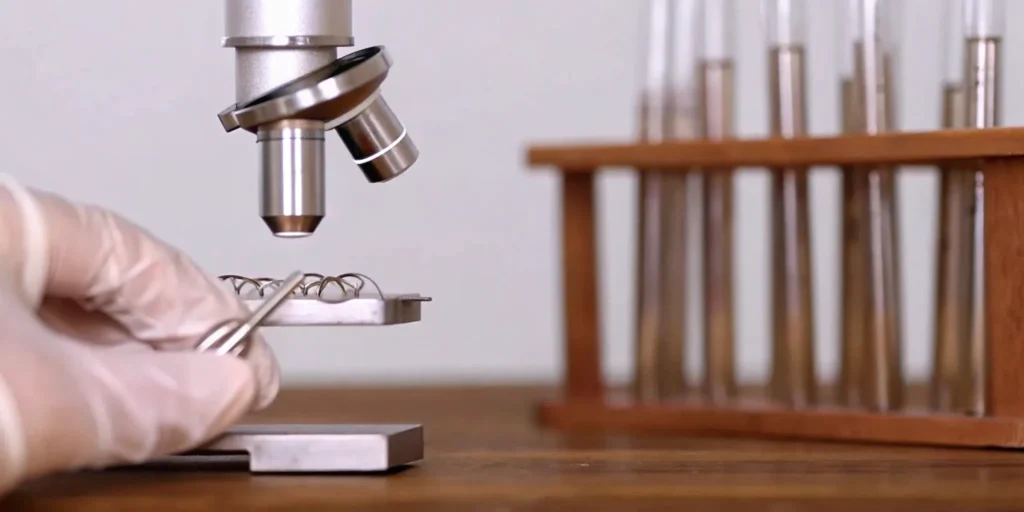
Many teams make the mistake of treating quality as something to be tested for at the end of the development process. This reactive approach often leads to failed tests, expensive rework, and major delays. A strong medical device design control process flips this script entirely. It’s a proactive framework that builds quality and safety into your device from the very first step. By systematically translating user needs into testable design requirements, you catch potential issues early and ensure every decision is deliberate and documented. This method doesn’t just help you pass audits; it helps you build a better, more reliable product efficiently.
Key Takeaways
- Build Quality In, Don’t Test for It Later: Treat design controls as your strategic framework for development. This proactive process ensures safety and effectiveness are built into your device from the initial concept, which is exactly what regulators want to see.
- Know the Difference Between Verification and Validation: These two steps answer different critical questions. Verification confirms you built the device to your own specifications (“Did we build it right?”), while validation proves it works for the end-user (“Did we build the right device?”). You must prove both.
- Create Your Design History File (DHF) as You Go: Your DHF is the official biography of your device, not a report you write at the end. Document every decision, test, and review in real-time to create a complete, traceable record that makes audits straightforward.
What Are Medical Device Design Controls?
Think of design controls as the blueprint and quality assurance plan for your medical device, all rolled into one. They are a formal, systematic set of processes that you apply throughout the entire development lifecycle. The goal is simple: to ensure your final product is safe, effective, and does exactly what you claim it does. This isn’t just a best practice; it’s a mandatory requirement from regulatory bodies like the FDA.
From the initial spark of an idea to the final product launch and beyond, design controls provide a structured framework. This framework helps your team translate user needs into concrete design specifications, and then verify and validate that those specifications have been met. It’s about building quality and safety into your device from the very beginning, rather than trying to test for it at the end. By following this process, you create a clear, traceable record that proves your device was developed thoughtfully and rigorously, which is exactly what regulators want to see. This documented journey is captured in what’s known as the Design History File (DHF).
Why Design Controls Matter
Implementing design controls is fundamental to your success for two key reasons: patient safety and regulatory compliance. First and foremost, this structured process helps you minimize risks and build a device that reliably meets the needs of its users. By ensuring every design choice is intentional and tested, you significantly improve the device’s overall safety and effectiveness, which is the ultimate goal for any medical product. This proactive approach helps prevent device failures and potential patient harm down the line.
Beyond the ethical imperative, design controls are essential for meeting strict regulatory requirements. In the United States, the FDA mandates design controls under 21 CFR Part 820, and internationally, the ISO 13485 standard sets similar expectations. Adhering to these guidelines isn’t just about getting your product to market; it’s about keeping it there. A well-executed design control process provides the proof needed to pass audits and avoid costly delays, redesigns, or recalls.
The Core Components of Design Control
The design control process follows a logical progression, with each stage building on the last. It starts with defining user needs and planning the entire project. From there, you establish your Design Inputs—these are the specific performance, safety, and functional requirements your device must meet. Next, you create Design Outputs, which are the documents and specifications that describe the device, like drawings and material requirements.
Throughout the process, you’ll conduct formal Design Reviews at key milestones to ensure everything is on track. The core of the process involves Design Verification and Validation. Verification confirms that your design outputs meet your input requirements (did you design the device correctly?), while Validation ensures the finished device meets the user’s needs (did you design the correct device?). Finally, Design Transfer moves the design from development to production, and you’ll maintain a Design History File (DHF) to document every step.
Follow the Design Control Lifecycle
Think of the design control lifecycle as your roadmap for developing a medical device. It’s a structured, phase-based approach that guides your project from a simple idea to a market-ready product. Following this lifecycle isn’t just about checking boxes for the FDA; it’s about building a safe, effective, and reliable device in the most efficient way possible. Each phase builds on the last, creating a clear and traceable path that proves your device was designed correctly. This process helps you catch issues early, avoid costly rework, and ensure your final product truly meets the needs of its users. Let’s walk through the key phases you’ll follow.
Establish Your Design Inputs
This is your foundation. Before you can design anything, you need to define exactly what you’re building and why. Design inputs are the specific, measurable requirements your device must meet. These aren’t vague goals; they are concrete criteria based on the needs of the end-user. To develop them, you’ll pull from several sources, including direct user feedback, established industry standards, and even an analysis of competitor products. The key is to make every input clear, concise, and testable. This clarity is essential because your entire development process, from initial sketches to final production, will trace back to these foundational requirements. Getting your design inputs right from the start saves you major headaches down the road.
Define Your Design Outputs
Once you have your design inputs locked in, it’s time to translate them into tangible specifications. This is where you define how you will meet those requirements. Design outputs are the detailed documents that describe your device, including drawings, material specifications, and manufacturing instructions. Essentially, they are the complete recipe for building your product. These documents are critical because they provide the blueprint for consistent production and serve as the evidence that your device was built according to its initial design plan. Your design outputs must directly correlate to your design inputs, creating a clear link between what the user needs and what your team creates.
Conduct Formal Design Reviews
Design reviews are planned checkpoints, not last-minute meetings. These formal reviews should happen at the end of each significant design phase. The goal is to bring your cross-functional team together to review progress, discuss findings, and approve the design before moving to the next stage. This iterative process is essential for a successful outcome, as it allows you to identify and address problems early on. During these reviews, you’ll evaluate whether the design outputs meet the input requirements. It’s also crucial that every review is meticulously documented—including who attended, what was discussed, and any action items. This documentation becomes a vital part of your Design History File (DHF).
Know the Difference: Verification vs. Validation
In medical device development, the terms “verification” and “validation” are often used interchangeably, but they represent two distinct and equally critical stages. Think of it this way: verification asks, “Did we design the device right?” while validation asks, “Did we design the right device?” Getting both right is essential for ensuring your product is safe, effective, and compliant with FDA regulations. Both processes require objective evidence to prove you’ve met your goals, creating a paper trail that becomes part of your Design History File (DHF). This distinction is more than just semantics; it’s a core principle of design control that ensures you’re not only meeting technical requirements but also fulfilling a real-world clinical need. Understanding how they differ and work together is fundamental to a successful and compliant development cycle.
Verify Your Device Meets Specifications
Design verification is the process of confirming that your design outputs meet your design inputs. Essentially, you’re checking your work against your own blueprint. This is a technical, evidence-based step where you use testing, inspections, and analysis to prove that the device was built exactly as you intended. For example, if one of your design inputs was that a device must be sterile and packaged to maintain sterility for 12 months, verification would involve specific tests to confirm it meets that exact specification. This process requires you to gather objective evidence, like detailed test reports and inspection results, to demonstrate compliance.
Validate Your Device Meets User Needs
Design validation takes a step back to look at the bigger picture. This stage confirms that the finished device—the one you just verified—actually meets the needs of the end-user and is appropriate for its intended use. While verification is about meeting technical specs, validation is about solving the user’s problem effectively and safely in a real-world setting. This often involves clinical trials or usability testing with the actual people who will be using the device, like surgeons or patients. The goal is to confirm that the final product meets the User Needs, ensuring it’s not just technically sound but also clinically effective and user-friendly.
How to Incorporate User Feedback
User feedback isn’t just a final check; it’s the thread that should run through your entire design control process. Your project begins and ends with the user. Defining their needs clearly from the very start is what makes both verification and validation meaningful. These User Needs are the foundation of your design inputs, guiding every technical decision you make. Involving end-users during the validation phase is especially important, as their direct feedback is the ultimate confirmation that you’ve built the right product. This user-centric approach not only leads to a better, more successful device but also strengthens your compliance position by showing you’ve prioritized safety and efficacy from day one.
Create Your Design History File (DHF)
Think of the Design History File, or DHF, as the official biography of your medical device. It’s a formal, organized collection of records that demonstrates your device was developed in accordance with your design and development plan and the requirements of FDA 21 CFR 820.30. This isn’t just a folder where you toss random documents; it’s a curated file that tells the complete story of your product’s journey from an idea to a finished, validated design. For regulators, the DHF is the ultimate proof that your design process was deliberate, thoughtful, and compliant from start to finish.
A well-maintained DHF is your best friend during an audit. When an FDA investigator asks for it, you can confidently provide a clear, comprehensive record that shows every decision, review, and test. It contains or references all the records necessary to prove that the design was developed under a state of control. This file compiles all the evidence from the design control activities we’ve already covered—your inputs, outputs, reviews, verification, and validation—into one cohesive narrative. Getting this right from the beginning will save you immense time and stress down the road.
What to Include in Your DHF
Your DHF should be a comprehensive collection that tells the complete story of your device’s creation. While the exact contents can vary based on your device’s complexity, every DHF must contain the core documentation generated through your design controls. It’s a comprehensive record of the entire design and development process, showing how each step logically follows the last.
Be sure to include:
- The Design and Development Plan
- User Needs and Design Inputs
- Design Outputs
- Design Verification and Validation plans, protocols, and reports
- Records of all formal Design Reviews
- Documentation of any Design Changes
- The final, approved device specifications for transfer to production
How to Manage Your DHF
How you manage your DHF is just as important as what you put in it. An organized, accessible file is crucial for both internal efficiency and regulatory readiness. While you can use a simple digital folder system, many companies find that using an electronic Quality Management System (eQMS) saves time and prevents errors. A key tool for managing your DHF is a traceability matrix. This matrix helps you visualize the relationships between user needs, design inputs, outputs, and testing activities, ensuring nothing gets missed. This clear, traceable path is exactly what auditors look for. Keeping your DHF organized and up-to-date makes it a valuable asset for your team, not just a regulatory burden.
Meet Key Regulatory Requirements
Think of design controls as your roadmap for regulatory approval. They aren’t just internal best practices; they are mandatory requirements enforced by regulatory bodies around the world. Getting your medical device to market means demonstrating that you’ve followed a systematic, documented process to ensure it’s safe and effective. While the specific rules can vary by region, the core principles are universal. Major regulatory bodies like the US Food and Drug Administration (FDA) and the International Organization for Standardization (ISO) have established frameworks that guide this entire process. Understanding these requirements from the start will save you from major headaches and costly delays down the road.
An Overview of FDA and ISO Standards
In the United States, the FDA sets the rules. Specifically, the Quality System Regulation (QSR) found in 21 CFR Part 820 outlines the necessity of design controls for most medical devices. These regulations apply to all Class II and Class III devices, as well as some Class I devices. The FDA requires you to establish and maintain procedures to control the design of your device to ensure that specified design requirements are met.
Internationally, ISO 13485 is the go-to standard for medical device quality management systems. While it’s a voluntary standard, compliance is often seen as a prerequisite for entering markets in the European Union, Canada, and other countries. It provides a framework for your entire quality system, with design and development controls being a critical component.
A Look at Global Harmonization
While the FDA’s 21 CFR Part 820 and the EU’s Medical Device Regulation (MDR) have their own specific requirements, they share a common goal with ISO 13485: ensuring patient safety. This shared objective has led to significant overlap and a global push toward harmonization. All major global frameworks mandate rigorous design controls to prove that devices are built safely, perform as intended, and are supported by complete, traceable documentation. Adopting a robust design control process that aligns with ISO 13485 from the beginning can streamline your path to compliance in multiple markets, making it easier to meet the requirements of different regulatory bodies without starting from scratch each time.
How to Implement Strong Design Controls
Putting strong design controls into practice is less about following a rigid checklist and more about weaving a culture of quality and foresight into your development process. It’s a proactive stance that transforms compliance from a hurdle into a strategic advantage. A successful implementation rests on three core pillars: integrating risk management from the very beginning, maintaining meticulous documentation, and fostering a collaborative environment. By focusing on these areas, you can build a framework that not only meets regulatory standards but also produces safer, more effective medical devices. Let’s break down how to make each of these pillars a functional part of your workflow.
Integrate Risk Management from the Start
Treating risk management as a separate activity from design is one of the most common problems medical device companies face. Instead of waiting until the end of the process to assess risk, you should build it into the foundation of your design. From the moment you define your user needs and design inputs, your team should be asking, “What could go wrong?” This proactive approach, aligned with ISO 14971, ensures that safety isn’t an afterthought. By identifying potential hazards early, you can design risk controls directly into the device, rather than trying to add them on later. This saves significant time and resources by preventing late-stage redesigns and demonstrates a deep commitment to patient safety from day one.
Develop a Clear Documentation Strategy
The development of a medical device is a complex and challenging process, and your documentation is the official record that proves you managed that complexity effectively. A clear documentation strategy is non-negotiable. This means creating standardized templates for all your design control elements, including design inputs, outputs, review minutes, and verification and validation plans. Your Design History File (DHF) should tell a clear and logical story of the device’s journey from concept to final design. Make sure your documentation is stored in a centralized, accessible system where every team member can find the latest versions. This prevents confusion, streamlines audits, and makes it much easier to manage design changes down the road.
Encourage Team Collaboration and Reviews
Medical device development is a team sport, requiring input from engineers, clinicians, regulatory experts, and quality professionals. In a market with fierce competition, this collaboration is what drives innovation and quality. Formal design reviews are the key forums for this collaboration to happen. These meetings shouldn’t be a simple check-the-box exercise. Instead, they are critical checkpoints where your cross-functional team can challenge assumptions, identify potential issues, and make key decisions together. To make these reviews effective, set a clear agenda, ensure the right people are in the room, and meticulously document all discussions, action items, and final approvals. This creates a culture of shared ownership and ensures the final product is robust, safe, and effective.
Solve Common Design Control Challenges
Even with a solid plan, the design control process can present tricky situations. Most teams run into similar hurdles along the way, but these challenges are well-understood and manageable with a proactive approach. Here are some of the most common issues medical device developers face and how you can solve them.
Balance Innovation and Compliance
Pushing the boundaries with a new device is exciting, but it can feel at odds with the strict demands of regulatory compliance. Many companies struggle to find the right balance, feeling pulled between the freedom to create and the need to follow rigid rules. The key is to see compliance as a framework that guides innovation toward a safer, more effective outcome. When you build regulatory requirements into your design process from the start, they become part of the creative challenge, not a roadblock. This approach helps you innovate responsibly within the complex landscape of challenges that define the medical device industry.
Manage Design Changes
What happens when you realize a core component needs to change mid-development? Managing design changes is a major pain point for many teams. Without a formal process, small adjustments can spiral, threatening your timeline and DHF integrity. The solution is a robust change control system where every proposed change is documented, reviewed for its impact, and formally approved. Separating risk management from design controls is a frequent misstep; integrating them ensures every change is also evaluated for risk. A structured process makes it easier to manage design controls and keeps your project on track while maintaining full traceability.
Streamline Your Documentation
The sheer volume of documentation for a Design History File can feel overwhelming. It’s easy for this to become a last-minute task, leading to a scramble before submission. To avoid this, you need a clear documentation strategy from day one. Think of your DHF as the story of your device’s journey. By creating documentation as you go, it becomes a natural part of the workflow, not an afterthought. Using standardized templates and digital tools helps keep everything organized and accessible. This ensures your device is backed by the complete, traceable documentation regulators require, without the last-minute scramble.
Use Technology to Your Advantage
Managing the mountain of documentation and intricate steps involved in design control can feel overwhelming. Relying on scattered spreadsheets, shared drives, and endless email chains is not just inefficient; it’s a recipe for compliance risks. A misplaced file or an outdated version of a document can lead to significant delays and audit findings. Thankfully, you don’t have to manage this complexity manually. The right technology can transform your design control process from a source of stress into a streamlined, compliant, and collaborative system.
By strategically using software, you can automate tedious tasks, reduce the chance of human error, and give your team the tools they need to work together effectively. This isn’t about adding another complicated system—it’s about simplifying your path to market by creating a single source of truth for your entire project. Instead of chasing down signatures or trying to find the latest version of a design input, your team can access everything they need in one place. This frees up valuable time and mental energy, allowing you to focus on what really matters: developing a safe and effective medical device that meets user needs. Let’s look at how specific tools can make this happen.
Find the Right Management Software
Let’s be honest: manual tracking is a recipe for compliance headaches. This is where dedicated design control software comes in. Think of it as a central command center for your entire project. This software is built to manage all your design control documents, track every change, and link requirements to testing, all in one place.
The biggest advantage is automation. The right platform can automate workflows, manage approvals, and ensure that nothing falls through the cracks. This significantly reduces the risk of human error, which is critical when preparing for an FDA audit. By investing in the right management software, you’re not just buying a tool; you’re building a more robust and efficient compliance framework for your medical device.
Use Tools for Better Collaboration
Design control is a team sport, involving everyone from engineers to quality assurance. Keeping everyone aligned is essential, and that’s where collaborative tools shine. These platforms move you beyond static documents and into a dynamic workspace where your team can work together in real time. This is especially important for maintaining your Design History File (DHF), ensuring it’s always organized, up-to-date, and audit-ready.
Effective tools also make it easier to integrate risk management directly into your design process from day one. When your team can see and comment on changes as they happen, potential issues are identified and addressed much earlier. This collaborative approach helps you respond quickly to new information, maintain compliance more effectively, and ultimately build a safer, more reliable product.
How Design Controls Impact Quality and Safety
Think of design controls as the blueprint for your medical device’s success. They aren’t just a regulatory checklist to get through; they are a fundamental framework that directly shapes the quality, safety, and effectiveness of your final product. Without this structured approach, development can become a chaotic process where critical user needs get lost and unforeseen risks creep in. Implementing strong design controls from the very beginning provides a clear, documented path from concept to launch. It forces a discipline that ensures every decision is deliberate and traceable, connecting each engineering specification back to a specific user need. This systematic process is what transforms a great idea into a safe and effective medical device. By building this framework into your product development lifecycle, you create a system of checks and balances. This proactive approach helps you catch potential issues early, saving you from costly redesigns and recalls down the road. More importantly, it builds a foundation of trust with both regulators and the patients who will ultimately rely on your device.
Meet User Needs and Improve Reliability
At its core, the design control process is about translation. It starts by clearly defining the user needs—what problem is your device solving, and for whom? These needs are then translated into specific, measurable design inputs, which become the technical requirements for your engineering team. This ensures that every feature and function is directly tied to a real-world purpose. Following a structured design control process forces your team to continuously check that the device you’re building aligns with the needs you set out to meet. This isn’t a one-and-done task; it’s an iterative cycle where feedback from testing informs and refines the design, leading to a more reliable and effective device.
Create a Path for Continuous Improvement
A well-implemented design control system does more than just get you to market; it creates a sustainable path for ongoing improvement. By meticulously documenting every step—from initial concepts to final validation—you create an invaluable record for your product. This documentation, known as the Design History File (DHF), provides clear traceability, showing how and why certain design decisions were made. If an issue arises post-launch or you want to develop a next-generation product, this file is your single source of truth. It helps you efficiently manage design changes, learn from past challenges, and consistently enhance your device’s safety and performance over its entire lifecycle.
Adopt These Design Control Best Practices
Putting a strong design control process in place is one thing, but making it truly effective requires adopting a few key mindsets. These best practices aren’t just about checking boxes; they’re about building a framework that consistently produces safe, reliable, and user-friendly medical devices. By embedding these principles into your workflow, you can move beyond simple compliance and create products that genuinely meet the needs of patients and clinicians.
Focus on User-Centered Design
At its heart, design control is about creating a device that works for the people who will actually use it. This is where a user-centered design approach becomes critical. Before you even think about technical specifications, you need a deep understanding of your end-users. What are their needs, preferences, and pain points? What environment will they be using the device in? Answering these questions is the true starting point for your design controls.
These user needs become the foundation for your design inputs, guiding every decision you make throughout the development lifecycle. Focusing on the user from day one ensures you’re not just building a functional device, but one that is intuitive, safe, and effective in a real-world setting.
Use Iterative Testing and Feedback
Medical device development is rarely a straight line from concept to launch. The most successful projects embrace an iterative process of testing and feedback. Instead of waiting until the end to see if everything works, you should build, test, and gather feedback in a continuous loop. Think of it as a conversation where each stage informs the next.
This iterative cycle allows you to catch issues early, refine your design, and make adjustments based on real data. Each round of testing and validation confirms that your design outputs are meeting your design inputs and, most importantly, that the final product is aligning with the user needs you identified at the start. This approach reduces risk and helps you build a better, safer product more efficiently.
Related Articles
- Product development and design control
- Medical Device Regulatory Compliance Services
- Medical Device Regulatory Compliance Services
- Remanufacturing of Medical Devices Updated Guidance
- 510k Submission for Medical devices
Frequently Asked Questions
My device is pretty simple. Do I really need to go through this whole design control process? That’s a very common question, especially for teams working on what seems like a straightforward product. While it’s true that some Class I devices are exempt, most medical devices, including all Class II and Class III products, fall under these requirements. It’s best to think of design controls less as a regulatory burden and more as a smart business practice. Following this process ensures you have a clear, documented record proving your device is safe and works as intended, which protects you, your company, and your future users from preventable issues.
What’s the most common mistake you see teams make with design controls? The biggest misstep is treating design controls as an administrative task to be completed at the end of a project. Many teams focus entirely on development and then try to assemble the documentation right before a regulatory submission. This almost always leads to a stressful scramble and creates gaps in the record. The most successful teams integrate design controls from day one, using them as a roadmap to guide development, manage risk, and make better decisions throughout the entire process.
When in the development process should we officially start our Design History File (DHF)? You should start your DHF the moment your project begins. It’s not a binder you fill out after the fact; it’s a living collection of documents that grows with your project. The DHF begins with your very first records, like your initial design and development plan and your documented user needs. Every time you complete a new step—like defining design inputs or conducting a design review—that documentation becomes the next entry in the file.
You emphasized the difference between verification and validation. Can you give a simple, real-world example? Of course, it’s a concept that can be tricky at first. Imagine you’re designing a handheld blood glucose meter. Design verification would involve lab tests to confirm the device meets its technical specifications—for example, proving that its sensor can detect glucose levels within a +/- 5% accuracy range as written in your design documents. Design validation, on the other hand, would involve giving the final meter to actual diabetic patients to use at home, confirming they can use it easily, get an accurate reading, and that it ultimately helps them manage their health effectively.
Is it better to use special software or can we just manage this with shared folders? While you technically can use a system of shared folders, it becomes risky and inefficient very quickly. The real power of dedicated Quality Management System (QMS) software is its ability to create traceability. It automatically links your user needs to your design inputs, your testing, and your risk analysis. This creates a clear, connected story for auditors and prevents critical items from falling through the cracks, which is a common risk when you’re manually managing hundreds of separate documents.