In regulated manufacturing, the most expensive problems are the ones you don’t see coming. A single contaminated batch can trigger a devastating product recall, costing you money and the trust you’ve worked so hard to build. The best way to manage this risk isn’t by reacting to disasters, but by preventing them. A well-designed cleaning validation protocol is your most powerful proactive tool. It provides the documented proof that your cleaning methods work every single time, ensuring product consistency and protecting your brand from the catastrophic costs of a quality failure.
Key Takeaways
- Build Your Protocol on a Foundation of Risk: A strong protocol starts with a risk assessment, not a template. Use this analysis to set scientifically-justified residue limits and create detailed, repeatable cleaning procedures that form the backbone of your entire validation effort.
- Combine Practical Methods with a Well-Trained Team: Your validation is only as good as the data you collect and the people who collect it. Use a mix of testing methods—like visual checks, swabbing, and rinsing—and ensure your team is thoroughly trained on the “how” and “why” of each procedure.
- Treat Validation as a Living Process: A protocol isn’t a one-and-done document; it must evolve with your operations. Implement a system for periodic reviews, manage any changes to equipment or products, and revalidate when necessary to ensure your processes remain effective and compliant.
What Is a Cleaning Validation Protocol?
Think of a cleaning validation protocol as your master plan for proving that your cleaning procedures are effective and repeatable. It’s a formal document that lays out exactly how you’ll confirm that your equipment is consistently cleaned to a specific standard, removing any leftover product, ingredients, or cleaning agents. This isn’t just about wiping things down; it’s about creating a documented, scientific process that guarantees you’re preventing cross-contamination between batches.
A strong cleaning validation protocol outlines every critical detail of your validation study. It defines the objectives, identifies potential risks, and specifies the exact test methods and sampling plans you’ll use. Most importantly, it establishes clear acceptance criteria—the measurable standards that prove a piece of equipment is truly clean. This document becomes the blueprint for your entire team, ensuring everyone follows the same steps and understands the goals. It’s your evidence to regulators, and yourself, that your processes are under control and your products are safe. Without a solid protocol, you’re just cleaning. With one, you’re validating.
Cleaning Validation vs. Cleaning Verification
It’s easy to mix these two up, but they play very different roles in your quality system. Think of it this way: cleaning validation is the big, one-time project you run to prove your cleaning method actually works, consistently and reliably. It’s a deep, scientific study that results in a standardized, approved procedure. You do this to create the official playbook. On the other hand, cleaning verification is the quick, routine check you perform after every single cleaning run. It’s not another full study; it’s simply a confirmation that the validated procedure was followed correctly and the equipment is ready for the next batch. Validation establishes the standard, while verification confirms you’re meeting that standard every single time.
Understanding Key Terminology
To build a protocol that stands up to regulatory scrutiny, you need to speak the language of compliance. The terms used in cleaning validation aren’t just jargon; they are the building blocks for setting your acceptance criteria and making scientifically sound decisions. Getting them right is about more than just looking professional—it’s about ensuring your entire cleaning strategy is built on a solid, defensible framework that protects both your products and your business. Below are a few of the most critical terms you’ll encounter as you map out your validation plan.
API (Active Pharmaceutical Ingredient)
The API is the core component in a drug product—it’s the ingredient that produces the intended therapeutic effect. When it comes to cleaning validation, the API from the previous product is often the main residue you need to eliminate. Because many APIs can be potent even in microscopic amounts, proving they have been cleaned to a safe, acceptable level is one of the most critical objectives of your protocol. The specific properties of the API, including its potency and toxicity, will heavily influence the acceptance criteria you set for your cleaning process.
MACO (Maximum Allowable Carry Over)
MACO represents the maximum amount of a residue that is permitted to be carried over from one product to the next without creating a risk to product quality or patient safety. This isn’t a number you can just guess. It’s a scientifically calculated limit based on factors like the toxicity of the residue, the size of the next batch, and a significant safety margin. For instance, a common approach is to ensure the carryover is less than 1/1000th of the lowest therapeutic dose of the previous product. MACO gives you a specific, measurable target that your test results must meet to officially pass validation.
NOEL (No Observed Effect Level)
NOEL is a value taken from toxicological studies that represents the highest dose of a substance at which no negative effects are observed. This data is essential for establishing safe residue limits, particularly for cleaning agents or other potentially harmful materials that aren’t part of the product itself. By understanding a substance’s NOEL, you can work backward to calculate a scientifically justified MACO that ensures any potential residue is far below a level that could cause harm. It’s a fundamental piece of the puzzle for setting acceptance criteria that are both safe for consumers and defensible to regulators.
The Building Blocks of a Solid Protocol
At its heart, cleaning validation is about providing documented proof. You need to show that your cleaning methods consistently work as intended. This involves a detailed plan to verify that all residues—from active pharmaceutical ingredients (APIs) to cleaning chemicals—are removed to a pre-determined, safe level. The core elements include your specific cleaning methods, such as clean-in-place (CIP) systems, clean-out-of-place (COP) processes, or manual cleaning. You’ll also detail your sampling methods, which are typically either direct surface sampling with swabs or rinse sampling, where a solvent is used to collect a sample from a large surface area.
Which Industries Require Cleaning Validation?
While cleaning validation is most famously associated with the pharmaceutical industry, it’s a critical practice for any regulated sector where product purity is paramount. If you’re manufacturing dietary supplements, cosmetics, cannabis products, or even certain food and beverages, preventing cross-contamination is essential for both consumer safety and product quality. Any trace of a previous batch, an allergen, or a cleaning agent could compromise your next product, leading to recalls, regulatory action, and damage to your brand’s reputation. Essentially, if you operate in an environment where what’s left behind on your equipment could harm a consumer or affect your product’s integrity, you need a robust cleaning validation program.
Getting Familiar with Key Regulations
Navigating the regulatory landscape is a key part of developing your protocol. The FDA, for example, absolutely expects manufacturers to have validated their cleaning processes. However, they don’t provide a one-size-fits-all rulebook. The FDA’s guidance on cleaning processes intentionally leaves it up to each company to define its own residue limits and justify its methods based on the specific products and equipment involved. This flexibility requires you to have a deep understanding of your own processes. Other international bodies like the European Medicines Agency (EMA) and the World Health Organization (WHO) also provide guidelines, making it important to know which standards apply to your market.
What to Include in Your Cleaning Validation Protocol
A strong cleaning validation protocol is built on a few core pillars. Think of it as a detailed blueprint that leaves no room for error, guiding your team through every step of the process. Getting these components right from the start will make your validation efforts smoother, more effective, and much easier to defend during an audit. Each element works together to create a comprehensive plan that ensures your equipment is consistently clean and safe for producing your next batch.
Defining Your Documentation Requirements
Your protocol is the single source of truth for your entire cleaning validation process. This written plan needs to be clear, detailed, and formally approved before you begin any validation activities. It should explicitly state your objectives and outline the scope of the validation, including which pieces of equipment and products are involved. A critical part of this document is the risk assessment, which identifies potential failure points. Your protocol must also describe the specific cleaning procedures, testing methods, and scientifically-justified acceptance limits for any residues. Finally, it should explain exactly what to do if a test fails, ensuring you have a clear path forward for any deviations. This level of detail is central to FDA process validation principles.
Selecting Your Sampling Methods and Locations
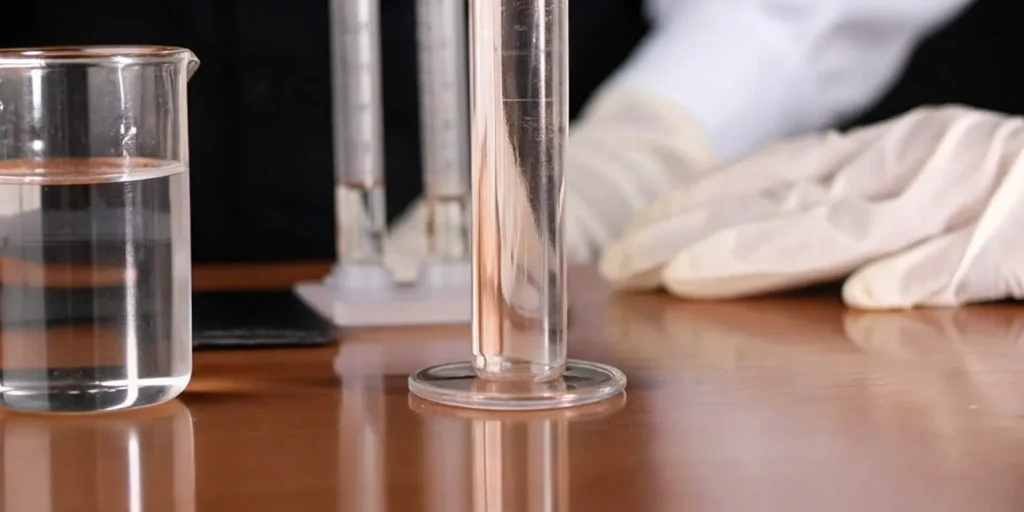
Once you have a cleaning procedure, you need a reliable way to prove it works. This is where sampling comes in. The two most common methods are direct swabbing and indirect rinsing. The swab method involves wiping a sterile cloth over a specific, predetermined area of the equipment surface to physically collect any residue for testing. It’s great for targeting hard-to-clean spots. The rinse method involves washing a surface with a solvent (like purified water) and then testing that liquid for contaminants. This approach is useful for large surface areas or internal systems like pipes that you can’t easily reach. Your protocol must specify which method you’ll use, why you chose it, and the exact locations you will sample from.
Setting Clear Acceptance Criteria
How do you know when your equipment is officially “clean”? Your acceptance criteria define the finish line. These standards must be measurable, achievable, and based on a scientific rationale. Typically, they include a few key checks. The first is a physical inspection to ensure there’s no visible residue left on the equipment. The second is a chemical analysis to confirm that any potential carryover of active ingredients or cleaning agents is below a safe, predetermined level. Common industry standards suggest limits like no more than 10 parts per million (ppm) of one product appearing in the next, but your specific limits should be based on a toxicological risk assessment of your products.
Calculating Residue Limits
Your residue limits are the specific, science-backed numbers that prove your cleaning process was successful. While every product requires its own risk assessment, the industry often leans on two common starting points. The first is the 10 parts per million (ppm) criterion, which states that no more than 10 ppm of the previous product should be detectable in the next product. The second is a health-based calculation, which ensures that no more than 0.1% of the normal therapeutic dose of the first product can be carried over into the maximum daily dose of the second. These aren’t arbitrary numbers; they are established benchmarks designed to prevent cross-contamination and ensure product purity. Your protocol must clearly state which criteria you are using and provide a robust scientific justification for why they are appropriate for your specific products and processes.
Setting Microbiological Limits
Beyond chemical residues, your cleaning process must also control for microbial contamination, often called bioburden. This is especially critical for products like cosmetics or dietary supplements where microbial growth can pose a serious safety risk. Your acceptance criteria should include clear limits for bacteria and mold, measured in colony-forming units (CFU). Common industry standards aim for no more than 20 CFU for bacteria and 2 CFU for molds collected from a sample area. Another way to measure this is by setting a limit for total contaminants, such as no more than 25 CFU per 25 square centimeters of surface area. Including these microbiological limits in your protocol demonstrates that your cleaning procedures are also effective sanitization steps, protecting your products from harmful microorganisms.
Defining Maximum Safe Surface Residue (MSSR)
The Maximum Safe Surface Residue (MSSR) is the foundational calculation that justifies all your other chemical limits. It represents the absolute highest amount of residue that can safely remain on a piece of equipment without posing any risk to the consumer of the next product. Calculating the MSSR is a critical step that connects the dots between the residue on a surface and patient safety. It takes into account the toxicity of the residue, the total equipment surface area, the batch size of the next product, and its maximum daily dose. This calculation provides the scientific rationale for your acceptance criteria, ensuring your limits are not just based on industry standards but are tailored to the specific health-based exposure limits of your products.
Establishing Training Standards for Your Team
You can have the best protocol in the world, but it’s only as effective as the people carrying it out. Your team needs to be thoroughly trained on the cleaning procedures and validation protocols. This training should cover more than just the step-by-step instructions; it should also explain the “why” behind each action to foster a deeper understanding of quality control. Make sure everyone involved, from the operators performing the cleaning to the lab technicians running the samples, is qualified for their role. It’s essential to document all training sessions and maintain records to demonstrate personnel competency, a core requirement of current Good Manufacturing Practices (cGMP).
How to Classify Your Equipment
Not all equipment presents the same cleaning challenge. The design of your machinery plays a huge role in how easily and effectively it can be cleaned. For example, equipment with smooth, seamless surfaces and sanitary fittings is far easier to clean than machinery with complex parts like ball valves, which can trap residues. Your protocol should account for these differences. It’s a good practice to classify equipment based on its design, complexity, and the risk of cross-contamination. This allows you to tailor your cleaning and validation efforts appropriately, focusing more intense scrutiny on higher-risk items. The FDA’s own guide on cleaning validation emphasizes the importance of equipment design in this process.
Why Cleaning Validation Is Non-Negotiable
Think of cleaning validation as more than just a regulatory hurdle; it’s a core pillar of your business’s integrity and success. It’s the documented proof that your cleaning processes effectively remove residues to prevent contamination between product batches. Without this proof, you’re operating on assumptions, which can have serious consequences for your products and the people who use them.
A strong cleaning validation protocol is your commitment to quality and safety. It demonstrates to regulators, partners, and customers that you have control over your manufacturing environment. Failing to validate your cleaning procedures can lead to product recalls, regulatory actions, and a damaged reputation that’s hard to rebuild. On the other hand, a well-executed protocol protects your brand, ensures product consistency, and creates a more efficient and predictable manufacturing operation. It’s a fundamental practice that safeguards both your customers and your bottom line.
The History Behind FDA Regulations
The FDA’s focus on cleaning validation isn’t just about paperwork; it’s rooted in real-world public health crises. Decades ago, serious incidents of cross-contamination highlighted the dangers of inadequate cleaning. For instance, traces of penicillin in other drugs caused severe allergic reactions, and pesticides contaminated ingredients because of reused or poorly cleaned equipment. These events were a wake-up call, showing that simply “cleaning” wasn’t enough. In response, regulators shifted the burden of proof to manufacturers. Now, the FDA expects companies to provide documented evidence that their cleaning methods actually work. This history is why the validation of cleaning processes is a cornerstone of modern manufacturing—it’s a proactive measure born from past failures to ensure consumer safety.
Protecting Product Safety and Quality
The main reason for cleaning validation is to protect the end-user. Every time you manufacture a product, you risk leaving behind trace amounts of active ingredients, cleaning agents, or even microbes on your equipment. If not properly removed, these residues can carry over into the next batch. This is known as cross-contamination, and it can compromise the safety, identity, and purity of your products. For a consumer, this could mean exposure to an unintended active ingredient or a contaminated product. A robust validation process confirms your cleaning methods work as intended, ensuring every product you release is safe and meets quality standards.
Why Staying Compliant Pays Off
Staying compliant with FDA and other regulatory standards isn’t just about avoiding penalties—it’s about maintaining operational stability. When your cleaning validation is solid, you significantly reduce the risk of failed batches, production delays, and costly investigations. A lack of proper validation is a common red flag for inspectors and can easily lead to observations or even formal Warning Letters. By proactively managing your validation program, you build a resilient quality system that can withstand regulatory scrutiny. This allows you to focus on production and growth instead of constantly reacting to compliance issues, saving you time, stress, and resources.
How Validation Saves You Money
While setting up a validation protocol requires an initial investment, it pales in comparison to the costs of failure. A single product recall can be financially devastating, involving not just the loss of the recalled batch but also the expenses of logistics, public relations, and potential legal action. Beyond recalls, inconsistent cleaning can lead to batch failures, forcing you to discard valuable products and materials. By validating your cleaning procedures, you are essentially investing in insurance against these catastrophic financial losses. It ensures product consistency, minimizes waste, and protects the brand reputation you’ve worked so hard to build.
Using Validation for Smart Risk Management
A modern cleaning validation program isn’t about treating every piece of equipment and every product identically. Instead, it uses a risk-based approach to focus your resources where they matter most. This involves identifying the highest-risk scenarios—such as products with toxic ingredients, equipment that is difficult to clean, or products made in sequence with very different formulations. By concentrating your validation efforts on these “worst-case” situations, you can confidently demonstrate that if your process works under the toughest conditions, it will certainly work under easier ones. This strategic method makes your validation program more efficient, effective, and defensible during an audit.
How to Develop an Effective Protocol
Developing an effective cleaning validation protocol is about more than just ticking boxes on a checklist; it’s about creating a strategic, science-based plan that guarantees your equipment is consistently clean and safe for every batch. A strong protocol is your roadmap for preventing cross-contamination, ensuring product quality, and staying compliant with regulatory standards. It’s a proactive document that anticipates potential issues and outlines clear, repeatable steps to prevent them. Think of it as the foundation of your entire cleaning process—if the foundation is solid, everything built upon it will be more stable and reliable.
The key is to move beyond a one-size-fits-all approach. Your protocol should be tailored specifically to your products, equipment, and processes. This means taking the time to understand your unique risks, define what “clean” truly means for your operations, and document every step with precision. By following a structured approach, you can build a protocol that is not only defensible during an audit but also practical for your team to execute day in and day out. The following steps will guide you through creating a comprehensive and effective protocol that protects both your products and your business.
Start with a Thorough Risk Assessment
Before you write a single procedure, you need to understand your risks. A thorough risk assessment is the first and most critical step because it helps you identify all the ways contamination could occur. This process involves looking at your entire manufacturing line—from raw materials to finished products—and pinpointing potential problem areas. Consider the toxicity of your ingredients, the solubility of residues, and the complexity of your equipment design.
This foundational step allows you to prioritize your efforts effectively. By evaluating the likelihood and severity of each risk, you can focus your resources on the most critical control points. A good risk assessment will guide every other part of your protocol, from setting residue limits to choosing sampling locations, ensuring your validation work is both efficient and meaningful.
Defining “Worst-Case” Products
When you manufacture multiple products on the same equipment, validating the cleaning process for every single one isn’t practical or necessary. Instead, you can use a risk-based strategy by identifying your “worst-case” product. This is the product that presents the biggest cleaning challenge, typically because it’s the least soluble (hardest to wash off) or the most potent, meaning even a tiny amount of residue is a concern. The logic is simple: if you can prove your cleaning process effectively removes the most difficult residue, you can be confident it will work for all the easier-to-clean products. This approach is a key part of a risk-based validation protocol, allowing you to use a single, rigorous test for multiple products and making your validation efforts both efficient and highly effective.
Using Indicator Drugs for Grouping
Taking the worst-case approach a step further, you can group similar products and select one “indicator” drug to stand in for the entire category during validation. This indicator is usually the worst-case product from that specific group. This strategy is especially useful when you have a family of products with similar formulations or when you introduce a new manufacturing process. According to industry guidelines, you should consider this method when there are big changes to your cleaning steps, drug ingredients, or equipment. By grouping products, you streamline the validation process, focusing your testing on the most representative challenge. It’s a smart way to manage your validation workload without compromising on the quality or safety of your products.
Choosing Your Cleaning Method
The right cleaning method depends entirely on your equipment and products. There’s no single best way to clean; the goal is to choose a process that is effective, repeatable, and can be validated. Your protocol needs to detail the specific method for each piece of equipment, whether it’s a fully automated system or a manual process. This section of your protocol should clearly justify why a particular method was chosen, linking it back to your risk assessment and the nature of the residues you need to remove. Documenting this choice is a key part of building a defensible validation plan.
Clean-in-Place (CIP) and Manual Cleaning
Two of the most common approaches are Clean-in-Place (CIP) systems and manual cleaning. CIP systems are automated processes used for equipment like large tanks and pipes that can’t be easily disassembled. They circulate cleaning solutions through the system, offering a high degree of consistency and reducing operator exposure to chemicals. Manual cleaning, on the other hand, is exactly what it sounds like—operators physically scrub, wipe, and rinse equipment. While it can be less consistent than automated methods, it’s often necessary for complex parts or smaller equipment. Your protocol must provide detailed, step-by-step instructions for manual procedures to ensure they are performed the same way every time.
Immersion and Ultrasonic Washing
For smaller, removable parts, immersion and ultrasonic washing are excellent options. Immersion involves completely soaking equipment components in a cleaning solution, which is effective for dissolving soluble residues. For more complex parts with hard-to-reach areas, ultrasonic washing is a powerful choice. This method uses high-frequency sound waves to create tiny bubbles in the cleaning solution that implode against the equipment’s surface, dislodging stubborn contaminants from crevices and joints. Both methods are highly effective when used correctly, and your protocol should specify details like soaking time, solution temperature, and the specific ultrasonic frequency to be used.
High-Pressure Spraying
When you need to clean large surface areas or remove tough, caked-on residues, high-pressure spraying can be incredibly effective. This method uses strong jets of water or a cleaning solution to physically blast contaminants off equipment surfaces. It’s often used for cleaning the interiors of large vessels or the exteriors of machinery. The effectiveness of this method depends on factors like water pressure, nozzle design, and the distance of the spray from the surface. Your protocol must define these parameters precisely to ensure the cleaning process is consistent and repeatable each time it’s performed.
Establishing Procedural Details
Once you’ve chosen your cleaning methods, you need to define the specific procedures that your team will follow. This is where you get into the nitty-gritty details that ensure consistency. Your protocol must clearly outline every step, from the moment production ends to when the clean equipment is stored. These details are not optional; they are the instructions that turn your validation plan into a repeatable, real-world process. Ambiguity is the enemy of validation, so be as specific as possible to eliminate any guesswork for your team.
Defining the Time Between Production and Cleaning
One of the most critical procedural details is the maximum time allowed between the end of a production run and the start of the cleaning process. The FDA’s guidance highlights that this interval is crucial. If residues are allowed to sit and dry, they can become significantly more difficult to remove, potentially rendering your validated cleaning procedure ineffective. This is especially true for sticky or gummy products. Your protocol should establish a specific, justified time limit—often called the “dirty hold time”—and your validation study must prove that your cleaning method is still effective even after that maximum hold time has passed.
Protocols for Post-Cleaning Storage
The cleaning process isn’t over until the equipment is properly stored. After the final rinse, equipment must be thoroughly dried to prevent the growth of mold, bacteria, or other germs. Your protocol should specify the drying method and how you will confirm that the equipment is completely dry. Once dry, it needs to be stored in a way that protects it from re-contamination. This usually means covering it or moving it to a designated clean storage area. Defining these post-cleaning steps is essential for maintaining the clean state of your equipment until its next use.
Validating Your Cleaning Agents
Choosing the right cleaning agent is only half the battle; you also have to prove two critical things. First, you must demonstrate that the chemical you’re using is actually effective at removing the specific product residues from your equipment surfaces. Second, you must prove that your rinsing process completely removes the cleaning agent itself. Leaving behind detergent residue can be just as bad as leaving behind product residue, as it can contaminate your next batch. Your validation protocol must include tests for cleaning agent residues, with clear acceptance criteria to confirm they have been removed to a safe, negligible level. This is a complex but non-negotiable step in ensuring your products are pure and safe for consumers.
Setting Appropriate Residue Limits
Once you know your risks, you need to define your target. Setting appropriate residue limits means establishing clear, scientifically justified maximums for any potential contaminants left on equipment surfaces after cleaning. This is how you quantitatively prove your equipment is clean enough for the next production run. These limits must be safe, achievable, and measurable.
When you establish acceptable residue limits, it’s important to look beyond just the active ingredient from the previous batch. You also need to account for other substances like cleaning agents, excipients, and any by-products or degradation products that might have formed. Defining these specific criteria gives your team a clear goal to work toward and provides a solid basis for your final validation report.
How to Document Your Protocol the Right Way
In the world of regulatory compliance, if it isn’t documented, it didn’t happen. Your cleaning validation protocol must be a detailed, formal document that outlines the entire validation plan. This includes the scope, objectives, responsibilities, procedures, and acceptance criteria. Clear and comprehensive documentation ensures that the validation process is performed consistently every time.
Your written procedures should be specific enough for anyone on the team to follow without confusion. They need to address different scenarios, such as cleaning between batches of the same product versus cleaning between different products. Having comprehensive, written procedures not only demonstrates control to regulators but also serves as an essential training tool for your staff, ensuring everyone understands their role in maintaining a clean and safe manufacturing environment.
Creating a Solid Change Management Plan
Your manufacturing environment isn’t static, and neither is your cleaning protocol. New equipment, different product formulations, or updated cleaning agents all represent changes that can impact the effectiveness of your validated cleaning process. That’s why a robust change management plan is essential. Your protocol should define what constitutes a “significant change” and outline the steps required to assess its impact.
Cleaning validation isn’t a one-and-done activity. It must be revisited whenever meaningful changes occur in your process. By planning for change from the beginning, you create a system for continuous oversight that keeps your validation status current. This proactive approach ensures your cleaning procedures remain effective over time and prevents you from falling out of compliance as your operations evolve.
Getting Your Whole Team on Board
Developing a cleaning validation protocol should never be a solo effort. Success depends on collaboration between various departments, including Quality Assurance, Production, Engineering, and Microbiology. Each team brings a unique and valuable perspective to the table. Production staff know the equipment and cleaning challenges firsthand, while QA ensures regulatory requirements are met, and the lab provides the analytical expertise.
By involving a cross-functional team, you create a more practical and robust protocol. This collaborative approach fosters a sense of shared ownership and ensures that the procedures are realistic and can be executed effectively on the production floor. A well-rounded cleaning validation plan built on collective expertise is far more likely to succeed and stand up to regulatory scrutiny.
What Are the Main Validation Methods?
Once you’ve defined your protocol’s framework, it’s time to get into the practical side of things: how you’ll actually test your equipment. Choosing the right validation methods is essential for gathering accurate data and proving your cleaning processes work. There isn’t a single “best” method; instead, you’ll likely use a combination of techniques to get a complete picture of your equipment’s cleanliness. This multi-faceted approach ensures you’re not missing anything. For example, a visual check might clear a surface that still holds microscopic residue, which a swab test would then pick up.
The main validation methods fall into a few categories. You have direct methods, like swabbing, where you physically sample the equipment surface. Then there are indirect methods, like rinse sampling, where you test a solution that has come into contact with the surface. And underpinning all of this is the visual inspection—the foundational check that should always come first. Each method provides a different piece of the puzzle. By understanding the strengths and applications of each, you can build a robust testing strategy that stands up to regulatory scrutiny and ensures your products are safe. Let’s walk through the most common methods so you can decide which ones make sense for your facility and products.
Visual Inspection: Your First Line of Defense
Think of visual inspection as your first and most immediate check. Before you get into any complex sampling, you need to confirm that a piece of equipment looks clean. This involves a careful, systematic check for any visible residue, dirt, or leftover material. It’s a simple but critical step that tells you if your basic cleaning procedures are effective. To do it right, make sure you have adequate lighting and that your team is trained on what to look for. A piece of equipment that passes visual inspection can then move on to more sensitive testing methods, but one that fails should be re-cleaned immediately.
Getting Swab Sampling Right
For contaminants you can’t see, swab sampling is a go-to method. This direct surface testing technique is highly effective for detecting trace amounts of residue that are invisible to the naked eye. The process involves using a sterile swab to wipe a specific, predetermined area of the equipment’s surface—usually a spot that is difficult to clean. That swab is then sent to a lab for analysis. This method is perfect for targeting high-risk areas and gives you precise, quantitative data about cleanliness on critical surfaces where product contact occurs, making it a powerful tool in your validation toolkit.
Using a Standard Swab Area
To make your swab sampling results meaningful, you can’t just wipe random spots. You need to use a standard, defined area for every sample you take—often a 10cm x 10cm square marked out with a sterile template. This consistency is what makes your data reliable and scientifically sound. It ensures that every test is comparable, allowing you to accurately track residue levels and prove your cleaning process works time and time again. By knowing the exact surface area you swabbed, you can then calculate the total amount of residue on the entire piece of equipment and compare it directly against your pre-set acceptance limits. Your protocol should clearly define these locations, often focusing on hard-to-clean spots, which is a key part of a defensible sampling plan.
When Should You Use Rinse Sampling?
What about equipment with complex internal parts, like pipes, hoses, or large tanks where swabbing isn’t practical? That’s where rinse sampling comes in. This method involves collecting a sample of the final rinse water or solvent used to clean the equipment. The logic is simple: if there are any residues left on the equipment surface, they will be picked up by the rinse solution. The lab then tests this sample to determine the level of contaminants. Rinse sampling is particularly useful for assessing the cleanliness of large surface areas and enclosed systems all at once, giving you a good overall picture of the equipment’s state.
Choosing the Right Analytical Tests
Collecting samples is only half the battle. You also need to select the right analytical tests to measure any potential residues accurately. The tests you choose must be sensitive enough to detect contaminants at or below your established acceptance limit. Common methods include High-Performance Liquid Chromatography (HPLC), which can identify specific active ingredients, and Total Organic Carbon (TOC) analysis, which measures all carbon-based residues. It’s crucial that whatever analytical method you use is validated to prove its accuracy, precision, and reliability for your specific needs.
Setting Timelines for Sample Analysis
Collecting a sample is just the first step; analyzing it promptly is just as critical. Any delay between collection and analysis introduces risk, as residues can degrade over time. This could lead to test results showing lower contamination levels than what was actually present, creating a false sense of security and a significant compliance gap. Your protocol must define a maximum ‘hold time’—the specific, justified window within which a sample must be analyzed to ensure its integrity. This isn’t an arbitrary deadline; it needs to be backed by stability data proving the sample remains unchanged. Documenting these timelines and consistently adhering to them is crucial, as it shows regulators you have firm controls over your testing variables and are committed to the accuracy of your validation data.
What Your Lab Needs to Succeed
Your cleaning validation is only as reliable as the lab that analyzes your samples. To ensure your results are trustworthy, your laboratory must use analytical tests that are proven to be accurate and sensitive enough to detect even trace amounts of residue. This isn’t just a best practice—it’s essential for maintaining compliance and guaranteeing product safety. Whether you have an in-house lab or work with a third-party partner, confirm that their methods are validated and that they can meet the detection limits required by your protocol. This final step ensures the data you base your conclusions on is sound.
How to Implement Quality Control and Monitoring
Developing a solid cleaning validation protocol is a huge step, but it’s only half the battle. The real test is putting it into practice consistently and effectively. This is where quality control and monitoring come in. Think of it as the system of checks and balances that turns your written protocol into a reliable, day-to-day reality. It’s how you ensure your processes are not only working but are also documented, tracked, and continuously improved. A strong monitoring plan gives you the oversight needed to catch potential issues before they become major problems, keeping your operations smooth and your products safe. It’s about creating a culture of quality that protects your business and your customers.
Training Your Staff for Consistency
Your team is your first line of defense in maintaining a clean and compliant facility. A protocol is just a document until your staff brings it to life, so effective training is absolutely essential. Make sure everyone involved, especially those handling complex equipment, understands not just what to do but why they’re doing it. Training should be hands-on, ongoing, and specific to the tasks each person performs. According to the FDA, proper training is crucial for ensuring staff understand and follow cleaning processes correctly. When your team is confident and knowledgeable, they become active participants in your quality system, helping to uphold standards and prevent errors.
Building a Bulletproof Documentation System
In the world of regulatory compliance, the golden rule is: if it wasn’t documented, it didn’t happen. A robust documentation system is your proof that you’re following your protocol consistently. This means creating clear, written instructions for every cleaning process, covering different scenarios like cleaning between product batches. You also need to keep detailed records of all your validation activities, from the initial studies to the final results and approvals. This meticulous record-keeping is not just for passing audits; it’s a vital tool for accountability, consistency, and troubleshooting any issues that may arise down the line.
Establishing Clear Monitoring Procedures
Cleaning validation isn’t a one-time event; it’s an ongoing commitment. To ensure your processes remain effective, you need to establish clear procedures for continuous monitoring. This involves regularly checking and testing your cleaning methods to confirm they are working correctly every single time. Consistent monitoring helps you spot any deviations from your validated state, allowing you to take corrective action quickly. This proactive approach is gaining more attention from regulators, who want to see that you have a system in place to maintain control over your processes long after the initial validation is complete.
How to Manage Your Validation Data Effectively
Wading through mountains of paperwork can be overwhelming and inefficient. This is where technology can be a game-changer. Using software tools can make your cleaning validation program much more accurate and manageable. These systems can help you schedule inspections, capture photo evidence of any issues, generate reports, and assign corrective tasks to your team. By centralizing your data, you can easily track the performance of your cleaning program and identify trends over time. This not only streamlines your workflow but also provides you with organized, accessible data that’s ready for any regulatory inspection.
What to Do When Things Go Wrong: A Plan for Deviations
No process is perfect, and sooner or later, you’ll encounter a deviation—like a test result that comes back over the acceptable residue limit. What you do next is critical. Simply re-cleaning and re-testing until you get a passing result isn’t enough; it signals that your process isn’t actually under control. Instead, you need a formal plan for handling these situations. A strong cleaning validation protocol requires you to investigate the root cause of the failure, implement a corrective action to fix the underlying issue, and then formally document the entire process before retesting. This demonstrates to regulators that you have a systematic and effective approach to problem-solving.
How to Meet Global Regulatory Standards
Selling your products in different countries means you’ll need to meet various regulatory standards. While this might sound complicated, many global agencies share similar goals: ensuring product safety and quality. Understanding the expectations of major bodies like the FDA in the United States and the EMA in Europe is the first step. These frameworks often overlap, so getting one right can set you up for success with others. The key is to build a cleaning validation protocol that is robust, scientifically sound, and flexible enough to satisfy different international requirements. Let’s look at what some of the major players expect.
What Does the FDA Expect?
The U.S. Food and Drug Administration (FDA) puts a lot of trust in manufacturers. Instead of giving you a strict checklist, the FDA expects you to be the expert on your own products and processes. Their guidance on the validation of cleaning processes makes it clear that you are responsible for setting appropriate residue limits and choosing the right cleaning methods. This means you need a strong scientific rationale for every decision you make. Your protocol must clearly justify why your chosen methods are effective and why your acceptance criteria are safe for consumers. Think of it as showing your work on a math problem—the final answer isn’t enough; you have to prove how you got there.
A Breakdown of EU GMP Guidelines
If you’re planning to sell in the European market, you’ll need to get familiar with the European Medicines Agency (EMA) and its Good Manufacturing Practice (GMP) guidelines. The EU takes a slightly more prescriptive, risk-based approach compared to the FDA. A key requirement is the establishment of Health-Based Exposure Limits (HBELs), which are calculated based on toxicological data to determine a safe residue level. This scientific, data-driven method is central to the EU’s GMP framework. Your cleaning validation protocol must demonstrate a thorough risk assessment and show exactly how you’re managing potential cross-contamination based on these calculated health-based limits.
Adhering to Key ISO Standards
While not a regulatory agency itself, the International Organization for Standardization (ISO) provides powerful frameworks that support compliance. Think of ISO standards as the foundation for your quality management system. For example, adhering to ISO 9001 helps you establish, document, and maintain the processes needed for consistent quality—which is exactly what cleaning validation is all about. Integrating ISO principles into your operations shows regulators that you have a systematic and proactive approach to quality control. It demonstrates a commitment that goes beyond just meeting the minimum requirements, which can strengthen your compliance position significantly.
Understanding ISO 19227
If you want a standard designed specifically for cleaning validation, look no further than ISO 19227. It provides a detailed framework for validating your cleaning processes and, like many modern regulations, it’s built on a risk-based approach. The standard guides you to perform a thorough risk assessment to pinpoint contamination hazards and set scientifically-backed residue limits. It essentially takes the best practices we’ve covered—like comprehensive documentation, detailed procedures, and clear acceptance criteria—and organizes them into a globally recognized structure. Following this standard helps you meet global regulatory expectations and shows a deep commitment to quality. This builds trust with both regulators and your customers, strengthening your brand’s reputation.
Identifying Regulations for Your Industry
Beyond the major regulatory bodies, it’s crucial to remember that every industry has its own set of specific rules. The requirements for a cosmetic product are different from those for a dietary supplement or a tobacco product. For example, the FDA has distinct regulations for each of these categories, and your cleaning validation protocol needs to reflect the specific risks and standards relevant to your products. Before you finalize your protocol, make sure you’ve identified and incorporated all the industry-specific regulations that apply to you. This targeted approach ensures your validation efforts are not only compliant but also truly effective for your unique manufacturing environment.
Common Protocol Challenges (and How to Solve Them)
Developing a solid cleaning validation protocol is a major step, but the real test comes during implementation. Even with the best intentions, teams often run into predictable roadblocks that can compromise compliance and product safety. You might have a protocol that looks perfect on paper, but if it’s difficult to follow, poorly documented, or not supported by proper training, it won’t be effective in practice. These challenges aren’t signs of failure; they’re common hurdles in a complex process.
The key is to anticipate these issues and build solutions directly into your strategy. From ambiguous instructions that leave room for error to inconsistent sampling that misses critical spots, every challenge has a practical fix. By addressing documentation, training, cross-contamination risks, testing strategies, and quality assurance head-on, you can move from a theoretical protocol to a reliable, real-world system. Let’s walk through some of the most frequent challenges and the straightforward steps you can take to solve them.
Avoiding Unreliable Validation Methods
It’s tempting to look for shortcuts in a process as detailed as cleaning validation. Some methods might seem logical on the surface but fall apart under regulatory scrutiny because they don’t provide the scientific proof required. The goal isn’t just to make equipment look clean; it’s to prove, with data, that it meets a specific, predetermined standard of cleanliness. Relying on methods that don’t produce quantitative, reproducible results can give you a false sense of security and leave you exposed during an inspection. One of the most common examples of a well-intentioned but insufficient approach is the use of placebo batches.
Why Placebo Batches Aren’t Enough
Running a placebo batch—an inert batch of material—through freshly cleaned equipment seems like a practical way to check for leftover residue. The idea is that the placebo will “pick up” any contaminants left behind. Here’s the problem with that approach: it’s not a validated analytical method. It fails to provide the quantitative data needed to prove that residues are below your established acceptance limits. You might not detect anything, but that doesn’t mean the equipment is clean; it could just mean the placebo didn’t effectively collect the residue. Regulators expect you to use scientifically sound methods, like swab or rinse sampling paired with specific analytical tests, that can accurately measure any remaining contaminants and prove your process works consistently.
Tackling Common Documentation Challenges
One of the most common pitfalls is having documentation that is either too vague or incomplete. If your team has to guess what to do, they’ll likely do things differently each time, which completely undermines the point of validation. The solution is to create crystal-clear, detailed Standard Operating Procedures (SOPs) for every cleaning process. According to the FDA’s own inspection guides, you need written instructions that cover different scenarios, like cleaning between product batches or handling specific types of residues. Your SOPs should be so clear that a new team member could follow them without confusion.
How to Overcome Common Training Hurdles
You can have the best protocol in the world, but it’s useless if your staff isn’t trained to follow it correctly. A protocol is not just a document to be filed away; it’s a set of actions that people need to perform consistently. Effective training is non-negotiable, especially when dealing with complex equipment. Your training program should include hands-on demonstrations, clear explanations of why each step is important, and regular refreshers. Make sure every person responsible for cleaning understands their role and has demonstrated they can perform the tasks as required. This investment in your team is a direct investment in your product quality and compliance.
How to Prevent Cross-Contamination
At its core, cleaning validation is all about preventing cross-contamination. The challenge is proving that your cleaning process effectively removes all active ingredients, processing aids, and cleaning agents to a predetermined safe level. This isn’t just about looking clean; it’s about achieving a scientifically verifiable state of cleanliness. As experts at Bioprocess International note, cleaning validation is the formal evidence that your equipment is consistently cleaned. Your protocol must be designed to eliminate any risk of a previous batch contaminating the next, ensuring the safety and purity of every product you make.
Optimizing Your Testing Strategy
Knowing where, when, and how to test can feel overwhelming. Simply taking a few random samples isn’t enough to prove your equipment is clean. An optimized testing strategy is based on risk—you should focus on the hardest-to-clean areas and locations where residue is most likely to accumulate. Your protocol must clearly define your sampling plan, including specific locations and the frequency of testing. A robust strategy combines direct methods like swab sampling with indirect methods like rinse sampling. It also pairs simple visual inspections with precise analytical lab tests to detect and measure any potential residues.
Strengthening Your Quality Assurance Process
Treating cleaning validation as a one-time event is a recipe for trouble. A process that is valid today might not be tomorrow due to changes in equipment, personnel, or materials. Your Quality Assurance (QA) team plays a crucial role in ensuring the process remains in a validated state. The challenge is to build a system of continuous oversight. This means periodically reviewing cleaning records, monitoring for trends, investigating any deviations, and revalidating the process whenever significant changes occur. A strong QA function turns your validation protocol from a static document into a dynamic, living part of your quality management system.
How to Keep Your Protocol Current and Effective
Think of your cleaning validation protocol not as a document you write once and file away, but as a living part of your quality management system. The manufacturing environment is dynamic; you introduce new products, update equipment, and refine your processes. Your protocol needs to keep pace with these changes. An outdated protocol isn’t just a documentation error—it’s a direct risk to your product quality and regulatory standing. Failing to maintain your protocol can lead to cross-contamination, failed batches, and costly recalls. More importantly, it can result in warning letters or other enforcement actions from regulatory bodies like the FDA.
Maintaining your protocol is about demonstrating a continuous state of control over your processes. It shows inspectors that you are proactive, not reactive, when it comes to quality assurance. This ongoing vigilance is a cornerstone of Good Manufacturing Practices (GMP) and is essential for building a sustainable, compliant business. By treating your protocol as an active tool, you embed quality into your daily operations, ensuring that your cleaning procedures remain effective, efficient, and fully compliant year after year. This section will walk you through the practical steps for keeping your protocol robust and up-to-date.
Scheduling Regular Protocol Reviews
Cleaning validation isn’t a one-time event. It’s a continuous program that requires regular check-ins to ensure everything is still working as intended. A great starting point is to schedule periodic re-evaluations of your cleaning processes. For many industries, a common guideline is to re-test each piece of equipment at least once every three years. However, you should treat this as a minimum requirement. If you’re dealing with high-risk products or have noticed any inconsistencies in your monitoring data, you may need to conduct assessments more frequently. The best way to manage this is by creating a master validation schedule that outlines when each piece of equipment and process is due for review. This keeps your team organized and ensures nothing gets overlooked.
Defining Your Protocol Update Process
When it’s time to update your protocol, the process should be clear, controlled, and documented. This is where a formal change control procedure comes in. According to the FDA’s guidance, you need a written plan that specifies who is responsible for making changes, what the acceptance criteria are, and when re-validation is required. Your procedure should clearly define the steps for proposing, reviewing, approving, and implementing any changes to the cleaning process. This system ensures that every modification is carefully considered for its potential impact on product quality and that all relevant personnel are informed and trained on the new procedures. This creates a transparent and accountable system for managing change.
Knowing When It’s Time to Revalidate
Beyond your scheduled periodic reviews, certain events should automatically trigger a revalidation of your cleaning protocol. Think of these as red flags that signal a potential change in your process’s effectiveness. Revalidation is necessary whenever you make a significant change that could impact the original validation. This includes introducing new manufacturing equipment, altering the formulation of a product, or switching to a different cleaning agent. You should also revalidate if you make substantial changes to the cleaning process itself, like modifying water temperature, pressure, or contact time. Consistently failing to meet residue limits is another clear sign that it’s time to revisit and revalidate your protocol to identify and correct the root cause.
The “Three Consecutive Runs” Rule
To prove your cleaning process is truly effective, you need to follow the “Three Consecutive Runs” rule. This is a widely accepted industry standard that requires you to successfully execute and test your cleaning procedure three times in a row to validate its effectiveness. Why three times? Because a single successful run could be a fluke, but three consecutive successes provide powerful evidence that your method is reliable, repeatable, and consistently removes residues to your pre-defined limits. This rigorous approach is what regulators expect to see. It builds confidence in your cleaning methods and provides the documented proof you need to show that your process reliably prevents cross-contamination and maintains product integrity, batch after batch.
Setting a Revalidation Schedule
Cleaning validation is not a one-and-done activity; it requires ongoing management to remain effective. Your protocol must include a revalidation schedule to ensure your cleaning methods stay current with any changes in your operations. While a common industry guideline suggests re-testing each piece of manufacturing equipment at least once every three years, this should be seen as a baseline. A risk-based approach is always better—high-risk systems may need more frequent checks. This periodic re-evaluation confirms that your cleaning processes are still working as intended and helps you adapt to any changes in equipment, products, or personnel. By setting a clear schedule, you treat your validation program as a living system that safeguards product quality and maintains a state of continued process verification.
Embracing a Mindset of Continuous Improvement
The most effective quality systems are built on a foundation of continuous improvement. Instead of viewing validation as a compliance task to be checked off, see it as an opportunity to refine and strengthen your operations. Regularly review your monitoring data, conduct visual inspections, and gather feedback from your team on the floor. Are there ways to make the cleaning process more efficient without compromising its effectiveness? Could new technology or cleaning agents improve your results? Capturing all of this information within a Validation Master Plan (VMP) helps formalize this commitment. A VMP provides a high-level overview of your entire validation strategy and demonstrates a proactive approach to maintaining quality and compliance over the long term.
Related Articles
- Process Validation Failure Investigations: A Practical Guide
- The Complete Guide to Medical Device Validation
- Manufacturing Process Validation: The Ultimate Guide
Frequently Asked Questions
Is cleaning validation a one-time thing, or do I have to do it again? Think of your initial validation as setting the baseline. It proves your cleaning process works under specific conditions. However, it’s not a one-and-done activity. You’ll need to revalidate whenever you make a significant change, like introducing new equipment, altering a product’s formula, or switching cleaning agents. It’s also smart to schedule periodic reviews, perhaps every few years, just to confirm that nothing has drifted and your process remains as effective as ever.
My business is small. Do I really need such a formal cleaning validation protocol? Yes, if you’re in a regulated industry like cosmetics, dietary supplements, or cannabis products, the size of your business doesn’t change the need for safety and quality. A formal protocol is your proof that you’re preventing cross-contamination and protecting your customers. Regulators expect it, but more importantly, it’s a fundamental practice that protects your brand’s reputation and the integrity of your products, no matter your scale.
What’s the difference between ‘visibly clean’ and ‘analytically clean’? “Visibly clean” is the essential first step—if you can see residue on your equipment, it’s obviously not clean. However, many residues, like active ingredients or cleaning agents, are invisible to the naked eye. “Analytically clean” means you have scientific proof from lab testing that these microscopic, unseen residues have been removed to a safe, predetermined level. Visual inspection is the starting line, but analytical data is what gets you to the finish.
What’s the most common mistake you see companies make with their protocols? The biggest mistake is treating the protocol as a static document that gets filed away after it’s written. An effective protocol is a living part of your quality system. It needs to be supported by consistent training, diligent record-keeping, and regular reviews. When a protocol just sits on a shelf, it quickly becomes outdated, and the actual practices on the floor can drift away from the validated procedure, creating serious compliance risks.
How do I determine the ‘acceptance criteria’ or residue limits for my products? This is one of the most critical parts of your protocol, and it shouldn’t be a random guess. Your limits must be based on a scientific and toxicological risk assessment. You need to determine the highest amount of residue that could safely carry over into the next product without posing any risk to a consumer. While industry standards like 10 parts per million (ppm) can be a starting point, you must be able to justify your specific limits based on the nature of your ingredients and products.